Winformsアプリで一定間隔でコントロールを配置する
一定間隔でコントロールを配置するコンテナとして、以下の二つがよく使用されます:
1. FlowLayoutPanel
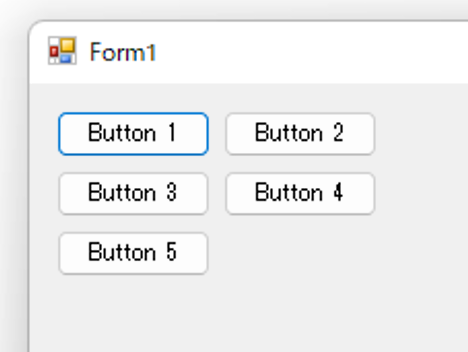
FlowLayoutPanelは、内部に配置されたコントロールを一定の間隔で順番に並べて表示するためのコンテナです。コントロールの追加順に従って配置され、ウィンドウサイズに応じて自動的に再配置されます。
// FlowLayoutPanelの作成と設定
FlowLayoutPanel flowLayoutPanel = new FlowLayoutPanel();
flowLayoutPanel.FlowDirection = FlowDirection.LeftToRight; // 左から右へ配置
flowLayoutPanel.WrapContents = true; // 自動的に折り返す
flowLayoutPanel.Padding = new Padding(10); // パディングを設定
flowLayoutPanel.AutoScroll = true; // スクロールバーを自動表示

// ボタンを追加
for (int i = 0; i < 5; i++)
{
    Button button = new Button();
    button.Text = $"Button {i + 1}";
    flowLayoutPanel.Controls.Add(button);
}

// フォームにFlowLayoutPanelを追加
this.Controls.Add(flowLayoutPanel);
2. TableLayoutPanel
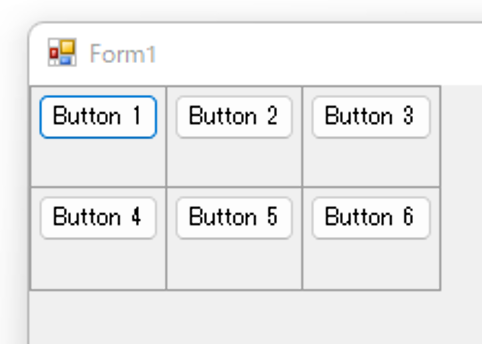
TableLayoutPanelは、グリッド状にコントロールを配置するためのコンテナです。各セルにコントロールを配置し、行と列のサイズやスタイルを細かく設定することができます。
// TableLayoutPanelの作成と設定
TableLayoutPanel tableLayoutPanel = new TableLayoutPanel();
tableLayoutPanel.RowCount = 2; // 行数を設定
tableLayoutPanel.ColumnCount = 3; // 列数を設定
tableLayoutPanel.CellBorderStyle = TableLayoutPanelCellBorderStyle.Single; // セルの境界線を表示

// 行と列のスタイルを設定
tableLayoutPanel.ColumnStyles.Add(new ColumnStyle(SizeType.Percent, 33.33F)); // 各列を同じ幅にする
tableLayoutPanel.ColumnStyles.Add(new ColumnStyle(SizeType.Percent, 33.33F));
tableLayoutPanel.ColumnStyles.Add(new ColumnStyle(SizeType.Percent, 33.33F));
tableLayoutPanel.RowStyles.Add(new RowStyle(SizeType.Percent, 50F)); // 各行を同じ高さにする
tableLayoutPanel.RowStyles.Add(new RowStyle(SizeType.Percent, 50F));

// ボタンを追加
for (int i = 0; i < 6; i++)
{
    Button button = new Button();
    button.Text = $"Button {i + 1}";
    tableLayoutPanel.Controls.Add(button, i % 3, i / 3); // 指定したセルにコントロールを追加
}

// フォームにTableLayoutPanelを追加
this.Controls.Add(tableLayoutPanel);
使用例の解説
- FlowLayoutPanel: コントロールを水平方向または垂直方向に順番に配置し、領域が不足すると自動的に折り返します。コンテンツが大きくなるとスクロールバーが表示されます。
- TableLayoutPanel: グリッド状のレイアウトを提供し、特定のセルにコントロールを配置することができます。行と列の幅や高さを柔軟に設定できます。
これらのコンテナを使うことで、一定の間隔でコントロールを配置し、整ったレイアウトを実現することができます。
訪問数 408 回, 今日の訪問数 1回


ディスカッション
コメント一覧
まだ、コメントがありません