WindowsFormプログラムで背景を透過しながらキャラクタを移動する
アルファ値(透過)を持ったPngファイルを用意して、透過キャラを表示、移動するサンプルになります。
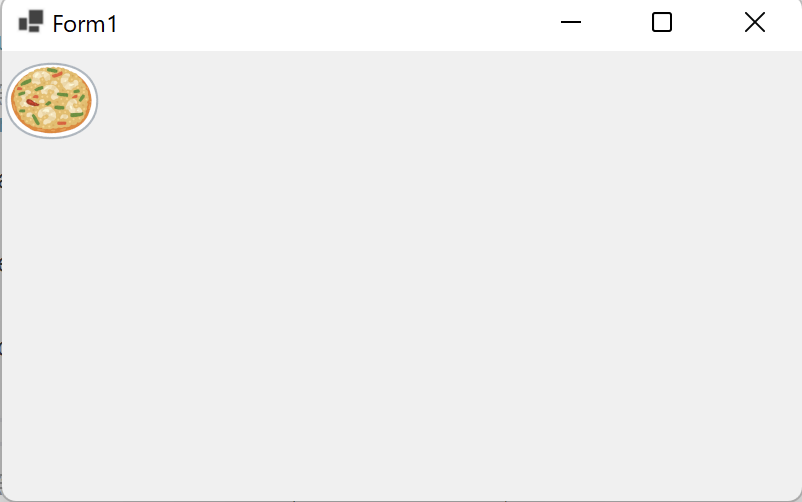
実行イメージ
サンプルコード
用意するもの
- 2つの透過画像(pngファイル)
- ちらつき防止のためForm1のDoubleBufferedプロパティをTrueにセットします。
- Timerは精度を上げるため、Window.Forms.Timerクラスではなく、Timersクラスを使います。
Form1.csサンプル
using System;
using System.Drawing;
using System.Timers;
using System.Windows.Forms;

namespace BitmapTransSample
{
    public partial class Form1 : Form
    {
        public Form1()
        {
            InitializeComponent();
        }

        int x = 0;
        int y = 0;

        Bitmap bitmap1;
        Bitmap bitmap2;

        protected override void OnPaint(PaintEventArgs e)
        {
            Graphics FormG = this.CreateGraphics();
            bitmap2.SetResolution(FormG.DpiX, FormG.DpiY);

            for (int x = 0; x < 5; x++)
            {
                for (int y = 0; y < 5; y++)
                {
                    e.Graphics.DrawImage(bitmap1, x * 100, y * 100);
                }
            }

            e.Graphics.DrawImage(bitmap2, x, 0);
            e.Graphics.DrawImage(bitmap2, x * 1.2f,100);
            e.Graphics.DrawImage(bitmap2, x * 1.5f, 200);

            e.Graphics.DrawImage(bitmap2, 100, y * 1.2f);
            e.Graphics.DrawImage(bitmap2, 150, y * 1.7f);
            e.Graphics.DrawImage(bitmap2, 200, y * 2.0f);

            e.Graphics.DrawImage(bitmap2, x * 1.2f, y * 1.2f);
            e.Graphics.DrawImage(bitmap2, x * 1.7f, y * 1.7f);
            e.Graphics.DrawImage(bitmap2, x * 1.7f, y * 2.0f);
        }

        private void Form1_Load(object sender, EventArgs e)
        {

            bitmap1 = new Bitmap(Properties.Resources.pie1);
            bitmap2 = new Bitmap(Properties.Resources.pie2);

            // タイマーの生成
            var timer = new System.Timers.Timer();
            timer.Elapsed += new ElapsedEventHandler(OnElapsed_TimersTimer);
            timer.Interval = 20;

            // タイマーを開始
            timer.Start();
        }

        private void OnElapsed_TimersTimer(object sender, ElapsedEventArgs e)
        {
            if (x > 300)
            {
                x = 0;
            }
            if (y > 300)
            {
                y = 0;
            }
            x += 10;
            y += 10;

            Invalidate();
        }
    }
}
このコードは、C#を使用してWindowsフォームアプリケーションを作成するためのサンプルです。このアプリケーションは、2つのビットマップ画像を使用して、画面上にアニメーションを表示します。
アプリケーションは、2つのビットマップ画像を読み込んで、アニメーション中に表示するために使用します。フォームがロードされると、タイマーオブジェクトが生成され、20ミリ秒ごとにOnElapsed_TimersTimerメソッドが呼び出されます。
OnElapsed_TimersTimerメソッドでは、xとyの座標を10ずつ増加させて、アニメーションの座標を変更しています。xとyの値が300を超えた場合は、0にリセットされます。また、Invalidateメソッドを呼び出して、フォームを再描画するように指示します。
OnPaintメソッドでは、画面に2つのビットマップ画像を表示するために、e.Graphics.DrawImageメソッドを使用しています。最初のforループでは、bitmap1を使用して、画面上に5×5のグリッドを描画しています。残りの部分では、bitmap2を使用して、アニメーションを表示しています。それぞれのDrawImage呼び出しでは、ビットマップ画像と表示する座標が指定されています。
このアプリケーションは、Windows Formsアプリケーションを学ぶためのサンプルであり、Windowsフォームアプリケーションの基本的な機能を示しています。ビットマップ画像を使用した簡単なアニメーションの表示方法や、タイマーオブジェクトの使用方法を学ぶことができます。
DoubleBuffered = true;Form1.Designer.csサンプル
namespace BitmapTransSample
{
    partial class Form1
    {
        /// <summary>
        /// 必要なデザイナー変数です。
        /// </summary>
        private System.ComponentModel.IContainer components = null;

        /// <summary>
        /// 使用中のリソースをすべてクリーンアップします。
        /// </summary>
        /// <param name="disposing">マネージド リソースを破棄する場合は true を指定し、その他の場合は false を指定します。</param>
        protected override void Dispose(bool disposing)
        {
            if (disposing && (components != null))
            {
                components.Dispose();
            }
            base.Dispose(disposing);
        }

        #region Windows フォーム デザイナーで生成されたコード

        /// <summary>
        /// デザイナー サポートに必要なメソッドです。このメソッドの内容を
        /// コード エディターで変更しないでください。
        /// </summary>
        private void InitializeComponent()
        {
            this.SuspendLayout();
            //
            // Form1
            //
            this.AutoScaleDimensions = new System.Drawing.SizeF(13F, 24F);
            this.AutoScaleMode = System.Windows.Forms.AutoScaleMode.Font;
            this.BackColor = System.Drawing.SystemColors.Control;
            this.ClientSize = new System.Drawing.Size(1298, 956);
            this.DoubleBuffered = true;
            this.Name = "Form1";
            this.Text = "Form1";
            this.Load += new System.EventHandler(this.Form1_Load);
            this.ResumeLayout(false);

        }

        #endregion
    }
}
参考:クラス化したもの
クラス
using System.Drawing;
using System.Windows.Forms;

namespace SimpleDrow
{
    class GraphPicture
    {
        Control baseControl;

        public Point Position { get; set; }
        public Bitmap Bitmap { get; }

        public GraphPicture(Control baseControl,Bitmap bitmap, Point position)
        {
            this.baseControl = baseControl;
            Position = position;
            Bitmap = new Bitmap(bitmap);
        }

        public void OnPaint(PaintEventArgs e)
        {
            var formGraph = baseControl.CreateGraphics();
            Bitmap.SetResolution(formGraph.DpiX, formGraph.DpiY);

            e.Graphics.DrawImage(Bitmap, Position);
        }
    }
}
このコードは、C#のWindowsフォームアプリケーションで、画像を描画するためのクラス “GraphPicture" を定義しています。
このクラスには、以下のメンバーが含まれています。
- Control baseControl: 描画対象のコントロール
- Point Position: 画像を描画する座標
- Bitmap Bitmap: 描画する画像の Bitmap オブジェクト
GraphPictureクラスのコンストラクタでは、上記3つの引数を受け取り、PositionプロパティとBitmapプロパティを初期化します。また、Bitmapプロパティには、渡されたBitmapオブジェクトのコピーを作成します。
OnPaintメソッドでは、描画対象のコントロールのGraphicsオブジェクトを取得し、Bitmapオブジェクトに現在の解像度を設定します。そして、e.Graphics.DrawImageメソッドを使って、指定された位置にBitmapを描画します。
このクラスを使うことで、Windowsフォームアプリケーションの任意のコントロール上に画像を描画することができます。
使い方
表示のみ
座標(0,0)に画像を表示します
using GraphClassLibrary;

namespace SimpleSample
{
    public partial class Form1 : Form
    {
        GraphPicture pie;

        public Form1()
        {
            InitializeComponent();

            // 滑らかに描画するため
            DoubleBuffered = true;

            var bitmap = Properties.Resources.food_goon_pad_pong_curry;
            var position = new Point(0, 0);

            pie = new GraphPicture(this, bitmap, position);
        }

        protected override void OnPaint(PaintEventArgs e)
        {
            pie.OnPaint(e);
        }
    }
}
このコードは、C#のWindowsフォームアプリケーションを作成するためのサンプルコードの一部です。以下に、コードが行っていることを簡単に説明します。
最初の行の using GraphClassLibrary は、GraphClassLibraryという名前空間を使用することを宣言しています。
namespace SimpleSampleは、このクラスが属する名前空間を定義しています。
public partial class Form1 : Formは、Formクラスを継承したForm1クラスを定義しています。
GraphPicture pieは、GraphPictureオブジェクトを保持するための変数です。
Form1()は、Form1クラスのコンストラクタです。InitializeComponent()は、Visual Studioが生成したコードであり、フォームの初期化を行います。DoubleBufferedは、フォームの描画を滑らかにするためのプロパティです。
var bitmap = Properties.Resources.food_goon_pad_pong_curryは、アプリケーションのリソースから画像を読み込み、bitmap変数に格納します。
var position = new Point(0, 0)は、グラフィックスオブジェクトの表示位置を指定するPointオブジェクトを作成しています。
pie = new GraphPicture(this, bitmap, position)は、GraphPictureオブジェクトを作成し、pie変数に格納しています。
protected override void OnPaint(PaintEventArgs e)は、フォームの描画時に呼び出されるメソッドで、pie.OnPaint(e)を呼び出して、GraphPictureオブジェクトを描画します。
キャラクタを移動
表示されたキャラクタをシンプルに移動します
using System;
using System.Drawing;
using System.Windows.Forms;

namespace SimpleDrow
{
    public partial class Form1 : Form
    {
        GraphPicture pie;

        public Form1()
        {
            InitializeComponent();

            // 滑らかに描画するため
            DoubleBuffered = true;

            var position = new Point(0, 0);
            var bitmap = Properties.Resources.pie2;
            pie = new GraphPicture(this, bitmap, position);

            // タイマーの生成
            var timer = new Timer
            {
                Interval = 100
            };

            timer.Tick += Update;

            // タイマーを開始
            timer.Start();
        }

        private void Update(object sender, EventArgs e)
        {
            var x = pie.Position.X;
            x += 10;
            pie.Position = new Point(x, pie.Position.Y);

            if (pie.Position.X > 300)
            {
                x = 0;
                pie.Position = new Point(x, pie.Position.Y);
            }

            Invalidate();
        }

        protected override void OnPaint(PaintEventArgs e)
        {
            pie.OnPaint(e);
        }
    }
}
このコードは、C#のWindowsフォームアプリケーションを作成し、画面に画像を表示するためのものです。
まず、System、System.Drawing、System.Windows.Formsの3つの名前空間をインポートします。
Form1クラスは、Formクラスを継承しています。FormクラスはWindowsフォームの基本機能を提供するクラスです。
GraphPictureクラスは、Form1クラス内で使用される画像を表示するためのクラスです。pieという変数を宣言し、このクラスのインスタンスを保持しています。
Form1クラスのコンストラクター内では、ダブルバッファリングを有効にし、GraphPictureクラスのインスタンスを生成して、Timerクラスのインスタンスを生成しています。TimerクラスのTickイベントには、Updateメソッドを追加しています。そして、timer.Start()を呼び出して、タイマーを開始しています。
Updateメソッドは、タイマーが指定されたインターバルで呼び出されるたびに、pieのPositionを更新し、画像を右にスクロールします。Invalidate()メソッドを呼び出すことで、画面が再描画されます。
OnPaintメソッドは、フォームが再描画されたときに呼び出され、pieのOnPaintメソッドを呼び出して、画像を描画します。
複数のアイテムを出現させる
using GraphClassLibrary;

namespace SimpleSample
{
    public partial class Form1 : Form
    {
        List<GraphPicture> items = new List<GraphPicture>();

        public Form1()
        {
            InitializeComponent();

            // 滑らかに描画するため
            DoubleBuffered = true;

            var bitmap = Properties.Resources.food_goon_pad_pong_curry;

            var position = new Point(0, 0);

            var item = new GraphPicture(this, bitmap, position);

            items.Add(item);
        }

        protected override void OnPaint(PaintEventArgs e)
        {
            items.ForEach(item => item.OnPaint(e));
        }

        int x = 0;

        private void button1_Click(object sender, EventArgs e)
        {
            var bitmap = Properties.Resources.food_poo_pad_pong_curry;
            var position = new Point(x += 30, 30);

            var item = new GraphPicture(this, bitmap, position);

            items.Add(item);

            Invalidate();
        }
    }
}
イラストに属性を持たせる
Itemクラスを作成して、画像情報をとポイントをプロパティとして持たせます
オブジェクト作成ボタンで、インスタンスをnew演算子で作成します
ポイント一覧ボタンで、作成されたオブジェクトの属性のPointの一覧を表示します
Pointが60以下を削除ボタンで、60以下のオブジェクトをリストから削除しています
全てのコード
namespace MultiItemswithProperty
{
    public partial class Form1 : Form
    {
        List<Item> items = new List<Item>();

        public Form1()
        {
            InitializeComponent();

            DoubleBuffered = true;
        }

        protected override void OnPaint(PaintEventArgs e)
        {
            items.ForEach(player => player.OnPaint(e));
        }

        int x = 0;
        int point = 0;

        private void button1_Click(object sender, EventArgs e)
        {
            var bitmap = Properties.Resources.food_poo_pad_pong_curry;
            var position = new Point(x += 30, 30);

            var item = new Item(this, bitmap, position, point += 10);

            items.Add(item);

            Invalidate();
        }

        private void button2_Click(object sender, EventArgs e)
        {
            items.ForEach(item => textBox1.Text += $"Point = {item.Point}\r\n");
        }

        private void button3_Click(object sender, EventArgs e)
        {
            for (int i = items.Count - 1; i >= 0; i--)
            {
                if (items[i].Point <= 60)
                {
                    items.RemoveAt(i);
                }
            }

            textBox1.Text = "";

            items.ForEach(item => textBox1.Text += $"Point = {item.Point}\r\n");

            Invalidate();

        }
    }
}
このコードは、Windowsフォームアプリケーションで動作する、アイテムを表示するためのコードです。
まず、MultiItemswithPropertyという名前空間が定義され、その中にForm1というクラスが定義されています。Form1は、Formクラスを継承しており、Windowsフォームアプリケーションの画面を表します。
List<Item> itemsというフィールドが定義され、Itemクラスのインスタンスを複数保持するために使われます。
Form1クラスのコンストラクタでは、親クラスのコンストラクタを呼び出して初期化処理を行い、DoubleBufferedプロパティをtrueに設定して、画面のちらつきを軽減しています。
OnPaintメソッドは、画面が再描画されるたびに呼び出されるメソッドです。items.ForEach(player => player.OnPaint(e))というコードで、itemsリスト内の各Itemオブジェクトに対して、OnPaintメソッドを呼び出しています。この処理により、itemsリスト内のアイテムが画面に表示されます。
int xとint pointというフィールドが定義されており、button1_Clickメソッドで使用されます。button1_Clickメソッドは、ボタンがクリックされたときに呼び出されるメソッドです。このメソッドでは、アイテムを追加しています。
Properties.Resources.food_poo_pad_pong_curryは、アプリケーションに埋め込まれたリソースで、画像データを表しています。Pointクラスのインスタンスpositionと、pointという得点値を引数にとって、Itemクラスのインスタンスitemを作成しています。作成したitemをitemsリストに追加し、画面を再描画するためにInvalidateメソッドを呼び出しています。
button2_Clickメソッドは、ボタンがクリックされたときに呼び出されるメソッドです。このメソッドでは、itemsリスト内の各アイテムのPointプロパティの値を、テキストボックスに表示しています。
button3_Clickメソッドは、ボタンがクリックされたときに呼び出されるメソッドです。このメソッドでは、itemsリスト内の各アイテムのPointプロパティの値が60以下のものを、itemsリストから削除しています。削除後、テキストボックスをクリアし、残ったアイテムのPointプロパティの値をテキストボックスに表示しています。また、画面を再描画するためにInvalidateメソッドを呼び出しています。
以上が、このコードの概要です。Itemクラスがどのように定義されているかによって、具体的にどのようなアイテムが表示されるかが決まります。また、UI要素であるボタンやテキストボックスのクリックイベントを受け取って、適切な処理を行っています。
using GraphClassLibrary;

namespace MultiItemswithProperty
{
    class Item
    {
        public GraphPicture graphPicture;
        public int Point { get; set; }

        public Item(Control control,Bitmap bitmap,Point position, int point)
        {
            graphPicture = new GraphPicture(control, bitmap, position);
            Point = point;
        }

        public  void OnPaint(PaintEventArgs e)
        {
           graphPicture.OnPaint(e);
        }
    }
}
このコードは、GraphClassLibraryという名前空間を使用し、MultiItemswithPropertyという名前空間内にItemというクラスを定義しています。Itemクラスには、GraphPicture型のgraphPictureとint型のPointプロパティが定義されています。また、Itemクラスには、Control型のcontrol、Bitmap型のbitmap、Point型のposition、int型のpointを引数に取るコンストラクタと、PaintEventArgs型のeを引数に取るOnPaintメソッドが定義されています。
コンストラクタでは、GraphPictureクラスのインスタンスを生成し、graphPictureフィールドに代入しています。OnPaintメソッドでは、graphPictureのOnPaintメソッドを呼び出しています。つまり、Itemクラスは、グラフィックスを扱うGraphPictureクラスをラップしたクラスとなっています。
ソースコード
GraphClassLibraryライブラリ
グラフィックのイラストを描画するクラスが定義されています
SimpleSampleプロジェクト
クラスを使って1つだけのイラストを表示するサンプル
SimpleMovingプロジェクト
グラフィックのイラストを移動するサンプル
BitmapTransSampleプロジェクト
冒頭のたくさんのイラストが移動するサンプル
MultiItemsプロジェクト
グラフィックのイラストクラスを使って複数のイラストを表示するサンプル
MultiItemswithPropertyプロジェクト
画像に属性を持たせるサンプルで、複数のイラストを所持するListを使っています
また、Listから特定の条件のイラストを削除するサンプルも入っています