C#入門:ポリモーフィズム(Polymorphism)とは何か?
多態性で拡張性の高いコードを書く第一歩
1. はじめに
オブジェクト指向プログラミング(OOP)の三本柱――カプセル化・継承・ポリモーフィズム。
中でもポリモーフィズムは「同じメッセージで多くの形(多態性)を実現する」仕組みで、コードを“差し替えやすく”“破壊的変更なく拡張しやすく”してくれます。
2. ポリモーフィズムとは?
- ギリシャ語の poly-morph(多くの形) が語源。
- 大きく分けて
- コンパイル時多態(静的多態) … メソッド オーバーロード、ジェネリックなど
- 実行時多態(動的多態) … virtual + override、インターフェース実装
実行時多態では、派生クラスのインスタンスを基底型として扱っても、実際には派生クラスのオーバーライド メソッドが呼ばれるのがポイントです。
3. 基本構文
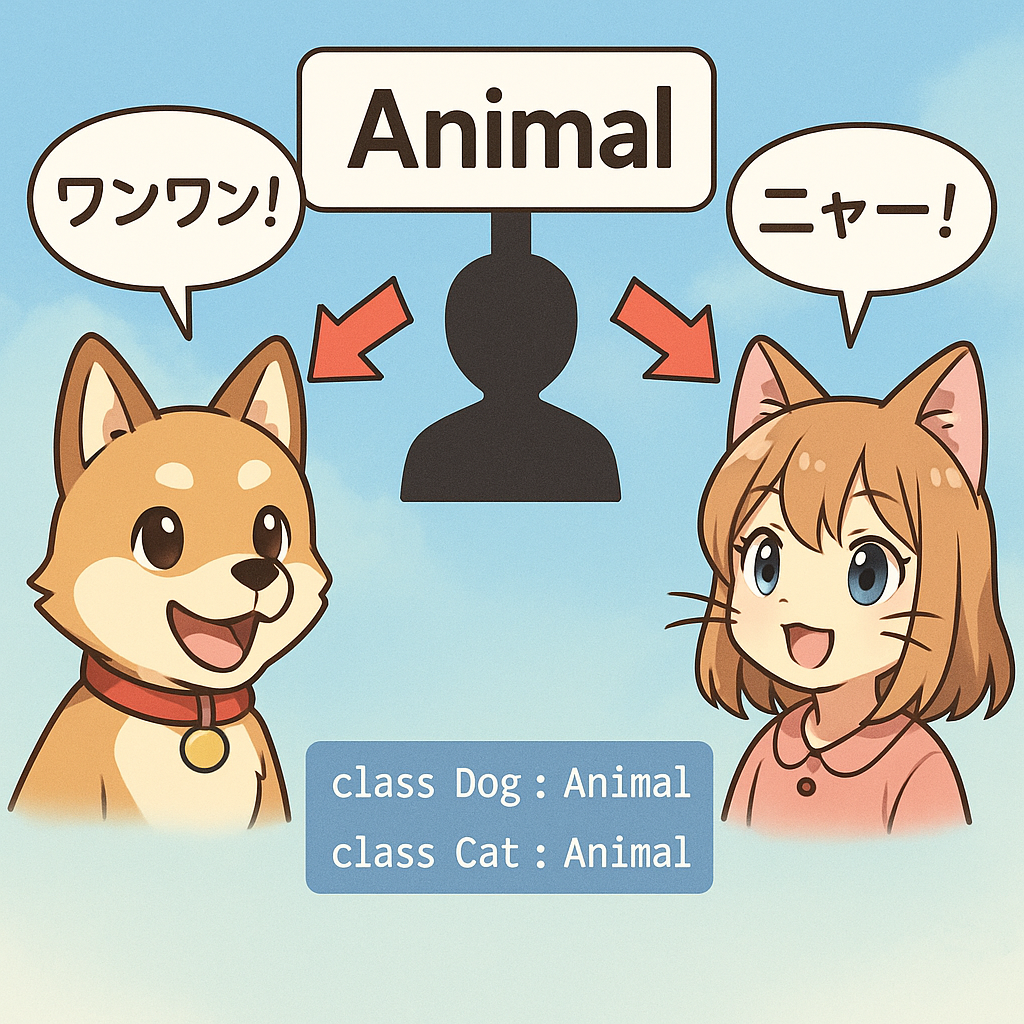
プロジェクト名 PolymorphismSample を作成し、以下のコードを実行してみましょう。
Animal 型の変数に Dog と Cat を代入し、実行時の多態性でそれぞれ「ワンワン!」「ニャー!」と鳴かせるポリモーフィズム例です。
class Animal
{
    public virtual void Speak()
    {
        Console.WriteLine("???");
    }
}

class Dog : Animal
{
    public override void Speak()
    {
        Console.WriteLine("ワンワン!");
    }
}

class Cat : Animal
{
    public override void Speak()
    {
        Console.WriteLine("ニャー!");
    }
}

static void Main()
{
    Animal a1 = new Dog();
    Animal a2 = new Cat();

    a1.Speak();   // → ワンワン!
    a2.Speak();   // → ニャー!
}using System;
using System.Collections.Generic;
using System.Linq;
using System.Text;
using System.Threading.Tasks;
namespace PolymorphismSample
{
internal class Program
{
static void Main(string[] args)
{
Animal a1 = new Dog();
Animal a2 = new Cat();
a1.Speak(); // → ワンワン!
a2.Speak(); // → ニャー!
}
}
class Animal
{
public virtual void Speak()
{
Console.WriteLine("???");
}
}
class Dog : Animal
{
public override void Speak()
{
Console.WriteLine("ワンワン!");
}
}
class Cat : Animal
{
public override void Speak()
{
Console.WriteLine("ニャー!");
}
}
}- virtual …… 基底クラス側。「上書きしてもいいよ」の印
- override …… 派生クラス側。「実際に上書きしたよ」の印
4. メリット
| 項目 | 内容 |
|---|---|
| 再利用性 | 共通機能を基底クラス/インターフェースに集約。派生クラスでは差分だけを書く |
| 拡張性 | 新しい派生型を追加しても既存コードは触らずに済む(OCP:開放/閉鎖原則) |
| 保守性 | 変更箇所が一点(基底側)に集まるため不具合が混入しにくい |
| 可読性 | List<Animal> のように 統一インターフェース で扱えてロジックが簡潔 |
5. virtual / override / abstract / new / sealed の使い分け
| キーワード | 目的 | 代表的な使いどころ |
|---|---|---|
| virtual | 上書き可能にする宣言 | 基本実装を提供しつつ差し替え余地を残したいとき |
| override | 親の virtual を上書き | 派生クラスで振る舞いを変更したいとき |
| abstract | 実装を持たず「必ず上書き」 | 派生ごとに必ず実装が変わる共通 API |
| new | 隠蔽。多態性は生まれない | 意図的に“別物”として旧 API を残す場合など |
| sealed | さらに派生できなくする | これ以上変更されたくない最終クラス |
1. virtual / override ― 基本実装を差し替える
class Animal           // 基底
{
    public virtual void Speak() => Console.WriteLine("???");
}

class Dog : Animal     // 派生
{
    public override void Speak() => Console.WriteLine("ワンワン!");
}

var a = new Dog();
a.Speak();             // → ワンワン!
2. abstract ― 実装を持たず「必ず上書き」
abstract class Shape            // 抽象クラス
{
    public abstract double Area();   // 実装なし
}

class Circle : Shape
{
    public double R;
    public Circle(double r) => R = r;
    public override double Area() => Math.PI * R * R;
}

var c = new Circle(3);
Console.WriteLine(c.Area());    // → 28.27…
Shape から直接インスタンス化できず、必ず派生側で Area を実装する。
3. new ― 名前は同じでも「別 API」として隠蔽
class Printer
{
    public void Print() => Console.WriteLine("Base Print");
}

class LaserPrinter : Printer
{
    public new void Print() => Console.WriteLine("Laser Print");
}

Printer p = new LaserPrinter();
p.Print();               // → Base Print   (多態性ナシ)

LaserPrinter lp = new LaserPrinter();
lp.Print();              // → Laser Print
変数の静的型が Printer のままなら旧実装が呼ばれる。
4. sealed ― これ以上いじらせない
(a) クラス全体を封印
sealed class Logger
{
    public void Log(string msg) => Console.WriteLine(msg);
}

// class CustomLogger : Logger { }   // ← コンパイルエラー(継承不可)
(b) メソッドの再オーバーライド禁止
class Base
{
    public virtual void Foo() { }
}

class Mid : Base
{
    public sealed override void Foo() { } // ここで打ち止め
}

class Leaf : Mid
{
    // public override void Foo() { }   // ← コンパイルエラー
}これらを組み合わせることで、「差し替えられる部分」と「固定したい部分」を明示的にコントロールできます。
- new は「隠蔽 (hiding)」派生クラスで同じシグネチャのメンバーを new 付きで宣言すると、基底クラスのメンバーを 上書き するのではなく 見えなく します。
- 多態性は発生しない変数の 静的型 が Animal なら、呼び出されるのは常に Animal 側の実装。Dog 側の new Speak() はコンパイル時点で無視されるため、動的ディスパッチ(ポリモーフィズム)は起きません。
- 旧 API を残したまま“別物”を提供したいときに使うたとえば既存クラスのメソッドを互換性のため残しつつ、派生クラスでまったく別の動作や戻り値型を持つ同名メソッドを用意したい場合などに new を付けて「これは別 API です」と明示します。
- 避けるのが基本意図的に旧仕様と区別したいケース以外では、override でポリモーフィズムを使うか、名前を変えて混乱を避けるのが一般的です。
注意 new でのメンバー隠蔽は実行時には基底型が呼ばれるため、多態性は得られません。
override との混同に要注意!
6. 実践例:共通コレクションで動的ディスパッチ
ShapeDrawerPolymorphismとしてプロジェクトを作成
abstract class Shape
{
    public abstract void Draw();
}

class Circle    : Shape { public override void Draw() => Console.WriteLine("○"); }
class Rectangle : Shape { public override void Draw() => Console.WriteLine("□"); }
class Triangle  : Shape { public override void Draw() => Console.WriteLine("△"); }

static void Main()
{
    var shapes = new List<Shape>
    {
        new Circle(),
        new Rectangle(),
        new Triangle()
    };

    foreach (var s in shapes) s.Draw();   // それぞれの図形が適切に描画される
}using System;
using System.Collections.Generic;
using System.Linq;
using System.Text;
using System.Threading.Tasks;
namespace ShapeDrawerPolymorphism
{
internal class Program
{
static void Main(string[] args)
{
var shapes = new List<Shape>
{
new Circle(),
new Rectangle(),
new Triangle()
};
foreach (var s in shapes)
{
s.Draw(); // それぞれの図形が適切に描画される
}
}
}
abstract class Shape
{
public abstract void Draw();
}
class Circle : Shape
{
public override void Draw()
{
Console.WriteLine("○");
}
}
class Rectangle : Shape
{
public override void Draw()
{
Console.WriteLine("□");
}
}
class Triangle : Shape
{
public override void Draw()
{
Console.WriteLine("△");
}
}
}- List<Shape> という 単一の視点 で扱える ➜ UI やゲームのレンダリングループがシンプルになる
- 追加図形クラスを List に突っ込むだけで既存コードはそのまま動く
7. インターフェースと抽象クラス
| 項目 | 抽象クラス (abstract) | インターフェース (interface) |
|---|---|---|
| 多重継承 | ×(単一) | ○ |
| メンバー | フィールド可、既定実装可 | フィールド不可、C# 8以降は既定実装可 |
| 適したケース | “近い同族”を階層で表したい | “共通動作契約”を横断的に付与したい |
実装例
interface IDamageable { void TakeDamage(int amount); }

class Enemy   : IDamageable { … }
class Barrel : IDamageable { … }using System;
using System.Collections.Generic;
using System.Linq;
using System.Text;
using System.Threading.Tasks;
namespace DamageablePlayground
{
using System;
using System.Collections.Generic;
interface IDamageable
{
int Health { get; }
void TakeDamage(int amount);
}
class Enemy : IDamageable
{
public int Health { get; private set; } = 50;
public void TakeDamage(int amount)
{
Health -= amount;
Console.WriteLine($"Enemy に {amount} ダメージ!(残り {Health} HP)");
if (Health <= 0)
Console.WriteLine("Enemy は倒れた!");
}
}
class Barrel : IDamageable
{
public int Health { get; private set; } = 20;
public void TakeDamage(int amount)
{
Health -= amount;
Console.WriteLine($"Barrel に {amount} ダメージ!(残り {Health} HP)");
if (Health <= 0)
Console.WriteLine("Barrel が爆発した!");
}
}
class Program
{
static void Main()
{
// IDamageable のリストにまとめて一括処理
var targets = new List<IDamageable>
{
new Enemy(),
new Barrel()
};
foreach (var t in targets)
{
t.TakeDamage(15);
}
Console.WriteLine("--- 2 回目の攻撃 ---");
foreach (var t in targets)
{
t.TakeDamage(15);
}
}
}
}使い方のポイント
- 共通インターフェース IDamageable を通じて、Enemy と Barrel を 同じコレクション に格納できる。
- 呼び出し側は TakeDamage しか知らないため、新しいダメージ対象(例:Crate や Door)を追加してもコードの追加・変更は最小限。
- 各クラスで被ダメージ時の振る舞い(死亡判定・爆発エフェクトなど)を自由に上書きできるので拡張性が高い。
List<IDamageable> として一括処理すれば「攻撃対象に見境なくダメージ」などが実現できます。
8. 注意点とアンチパターン
- is-a 関係が成り立たない継承
- Car is-a Engine は誤り → コンポジション(has-a) が適切
- 過剰な階層化
- 深い継承チェーンは可読性が下がる。2〜3段までに抑えるのが目安
- new と override の混同
- 動的ディスパッチが必要なら必ず override
- パフォーマンス
- 仮想呼び出しはわずかにオーバーヘッドがある。大量ループでは sealed で最適化の余地あり
9. 練習問題
問題 A
Shape を継承した Star クラスを実装し、Draw() で ★ を描画せよ。
問題 B
Animal を基底に Cow(「モォー!」)と Sheep(「メェー!」)を追加し、List<Animal> に混ぜて正しく鳴くことを確認せよ。
問題 C
IDamageable に Heal(int amount) を追加し、Enemy と Barrel で適切に実装せよ。
IDamageable のリストに対し、TakeDamage と Heal を交互に呼び出すテストコードを書き、挙動を観察せよ。
using System;
using System.Collections.Generic;
using System.Linq;
using System.Text;
using System.Threading.Tasks;

namespace QA
{
    using System;
    using System.Collections.Generic;

    #region ----------  問題 A:Shape → Star  ----------
    abstract class Shape
    {
        public abstract void Draw();
    }

    class Star : Shape
    {
        public override void Draw() => Console.WriteLine("★");
    }
    #endregion

    #region ----------  問題 B:Animal → Cow / Sheep  ----------
    class Animal
    {
        public virtual void Speak() => Console.WriteLine("???");
    }

    class Cow : Animal
    {
        public override void Speak() => Console.WriteLine("モォー!");
    }

    class Sheep : Animal
    {
        public override void Speak() => Console.WriteLine("メェー!");
    }
    #endregion

    #region ----------  問題 C:IDamageable(Heal 追加) ----------
    interface IDamageable
    {
        int Health { get; }
        void TakeDamage(int amount);
        void Heal(int amount);
    }

    class Enemy : IDamageable
    {
        public int Health { get; private set; } = 50;

        public void TakeDamage(int amount)
        {
            Health -= amount;
            Console.WriteLine($"Enemy に {amount} ダメージ(残り {Health} HP)");
            if (Health <= 0) Console.WriteLine("Enemy は倒れた!");
        }

        public void Heal(int amount)
        {
            Health += amount;
            Console.WriteLine($"Enemy は {amount} 回復(現在 {Health} HP)");
        }
    }

    class Barrel : IDamageable
    {
        public int Health { get; private set; } = 20;

        public void TakeDamage(int amount)
        {
            Health -= amount;
            Console.WriteLine($"Barrel に {amount} ダメージ(残り {Health} HP)");
            if (Health <= 0) Console.WriteLine("Barrel が爆発した!");
        }

        public void Heal(int amount)
        {
            // Barrel は通常回復しない想定だが、サンプルでは数値だけ戻す
            Health += amount;
            Console.WriteLine($"Barrel を {amount} 修理(現在 {Health} HP)");
        }
    }
    #endregion

    internal class Program
    {
        private static void Main()
        {
            // --- 問題 A:Star を描画 ---
            Console.WriteLine("▼ 問題 A --------------");
            Shape star = new Star();
            star.Draw();                       // → ★

            // --- 問題 B:Cow / Sheep を混在させて鳴かせる ---
            Console.WriteLine("\n▼ 問題 B --------------");
            var animals = new List<Animal>
        {
            new Cow(),
            new Sheep(),
            new Cow()
        };

            foreach (var a in animals)
                a.Speak();                     // → モォー! / メェー! / モォー!

            // --- 問題 C:ダメージと回復を交互に呼び出す ---
            Console.WriteLine("\n▼ 問題 C --------------");
            var targets = new List<IDamageable>
        {
            new Enemy(),
            new Barrel()
        };

            for (int i = 0; i < 3; i++)
            {
                Console.WriteLine($"\n-- ラウンド {i + 1} --");
                foreach (var t in targets)
                {
                    t.TakeDamage(15);          // ダメージ
                    t.Heal(10);                // 回復
                }
            }
        }
    }
}
10. まとめ
- ポリモーフィズム=多態性。同じメッセージで複数の具体的振る舞いを実現。
- virtual / override を使うと 実行時に自動で最適なメソッドが呼ばれる。
- インターフェース で「横方向の多態性」、抽象クラス で「階層的な多態性」。
- is-a 関係を常に確認し、コンポジションとの使い分け を意識する。
- 適切なポリモーフィズムは 再利用性・拡張性・保守性 を大幅に向上させる。
参考
- Microsoft Learn「Polymorphism」
- 同ブログの継承記事(https://soft-rime.com/post-24747/)の構成をベースに再構成
