【C#入門】同じ型でも動きが変わる|WinFormsで学ぶポリモーフィズムとvirtual・override
前回は、Button、Label、TextBox を共通の Control 型としてまとめて扱いました。
今回は、もう一歩進みます。
同じ型の変数として扱っていても、実際に入っているオブジェクトによって動きが変わる仕組みを、WinFormsのボタンで確認します。
この仕組みが、ポリモーフィズム(多態性)の入り口です。
① クリックするとメッセージを出すボタン
まず、クリックするとメッセージを表示する MessageButton を作ります。
using System;
using System.Windows.Forms;

public class MessageButton : Button
{
    public MessageButton()
    {
        AutoSize = true;
        Click += MessageButton_Click;
    }

    protected virtual string GetMessage()
    {
        return "通常のメッセージ";
    }

    private void MessageButton_Click(object sender, EventArgs e)
    {
        MessageBox.Show(GetMessage());
    }
}
GetMessage() は、表示する文字列を返すメソッドです。
ここでは virtual が付いています。
protected virtual string GetMessage()virtual は、派生クラス側でこのメソッドの動きを変更できるようにする指定です。
② 動きを変更するWarningButton
次に、MessageButton を継承した WarningButton を作ります。
public class WarningButton : MessageButton
{
    protected override string GetMessage()
    {
        return "注意が必要です";
    }
}
WarningButton では、GetMessage() に override を付けています。
protected override string GetMessage()override は、基底クラスで virtual として用意されたメソッドを、派生クラス用の動きに置き換える指定です。
③ 2種類のボタンをフォームへ置く
Form1 に通常ボタンと警告ボタンを追加します。
using System.Drawing;
using System.Windows.Forms;

public partial class Form1 : Form
{
    public Form1()
    {
        InitializeComponent();

        MessageButton normalButton = new MessageButton
        {
            Text = "通常",
            Location = new Point(30, 30)
        };

        MessageButton warningButton = new WarningButton
        {
            Text = "注意",
            Location = new Point(30, 80)
        };

        Controls.Add(normalButton);
        Controls.Add(warningButton);
    }
}
2つの変数は、どちらも MessageButton 型として宣言されています。
MessageButton normalButton
MessageButton warningButtonしかし、new している実体は異なります。
| 変数 | 宣言された型 | 実際のオブジェクト |
|---|---|---|
normalButton |
MessageButton |
MessageButton |
warningButton |
MessageButton |
WarningButton |
④ 同じ型でも結果が変わる
「通常」ボタンをクリックすると、MessageButton の GetMessage() が使われます。
通常のメッセージ「注意」ボタンをクリックすると、実体は WarningButton なので、オーバーライドした GetMessage() が使われます。
注意が必要です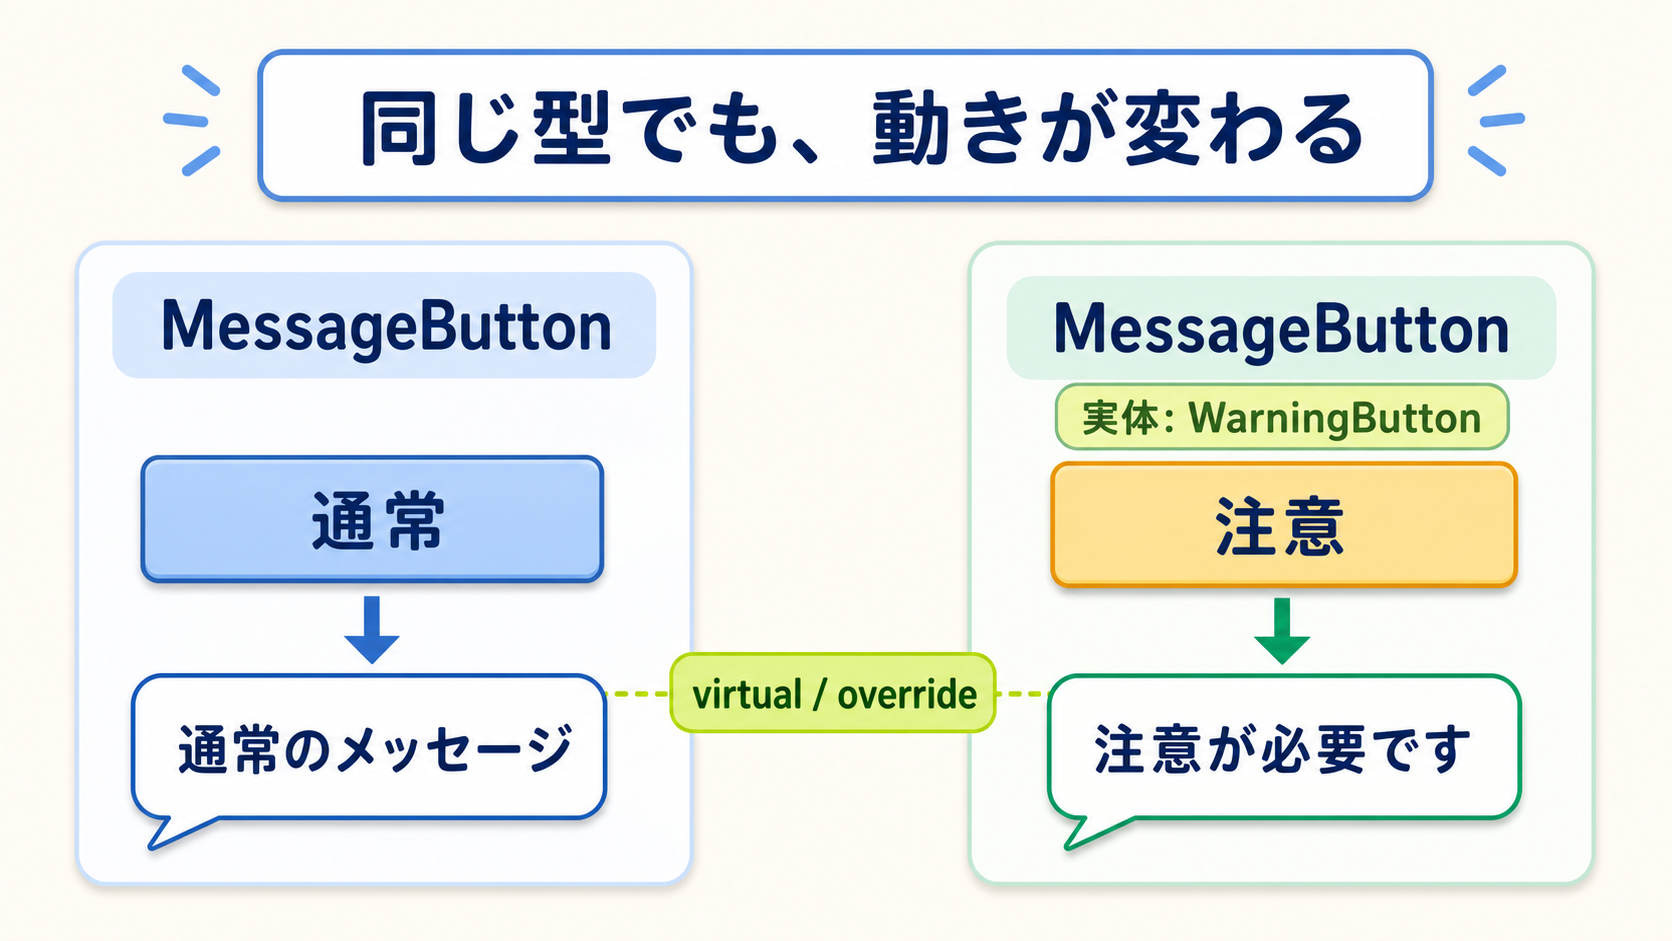
呼び出し側が実体ごとに if で分けなくても、各クラスが自分に合った動きを選びます。
これがポリモーフィズムの大きな利点です。
⑤ virtualとoverrideの役割
| キーワード | 書く場所 | 役割 |
|---|---|---|
virtual |
基底クラス | 派生クラスで動きを変更できるようにする |
override |
派生クラス | 基底クラスのvirtualメソッドを派生クラス用に実装する |
override するメソッドは、名前、戻り値の型、パラメーターを基底クラスの定義に合わせます。
今回の GetMessage() は protected なので、クラスの外から直接呼び出すためのものではありません。MessageButton と派生クラスの内部で利用する処理として用意しています。
⑥ baseを使うと元の処理も利用できる
派生クラスの結果に、基底クラスの結果を追加したい場合は base を使えます。
public class WarningButton : MessageButton
{
    protected override string GetMessage()
    {
        return base.GetMessage() + "\n注意が必要です";
    }
}
base.GetMessage() は、基底クラスである MessageButton の実装を呼び出します。
完全に置き換えるだけでなく、元の処理を利用しながら付け足すこともできます。
⑦ newで隠すこととの違い
C#には、同じ名前のメソッドを new で隠す書き方もあります。しかし、これは virtual と override によるポリモーフィズムとは別の仕組みです。
初学者のうちは、実体に応じて処理を切り替えたい場合は、基底クラスに virtual、派生クラスに override と覚えておきましょう。
⑧ 完成コード
MessageButton.cs
using System;
using System.Windows.Forms;

public class MessageButton : Button
{
    public MessageButton()
    {
        AutoSize = true;
        Click += MessageButton_Click;
    }

    protected virtual string GetMessage()
    {
        return "通常のメッセージ";
    }

    private void MessageButton_Click(object sender, EventArgs e)
    {
        MessageBox.Show(GetMessage());
    }
}
WarningButton.cs
public class WarningButton : MessageButton
{
    protected override string GetMessage()
    {
        return "注意が必要です";
    }
}
Form1.cs
using System.Drawing;
using System.Windows.Forms;

public partial class Form1 : Form
{
    public Form1()
    {
        InitializeComponent();

        MessageButton normalButton = new MessageButton
        {
            Text = "通常",
            Location = new Point(30, 30)
        };

        MessageButton warningButton = new WarningButton
        {
            Text = "注意",
            Location = new Point(30, 80)
        };

        Controls.Add(normalButton);
        Controls.Add(warningButton);
    }
}
⑨ 練習問題
① SuccessButton クラスを作り、「完了しました」と表示するように GetMessage() をオーバーライドしてみましょう。
② MessageButton 型の変数に SuccessButton のオブジェクトを代入し、正しいメッセージが表示されるか確認しましょう。
③ base.GetMessage() を使い、通常メッセージと追加メッセージの両方を表示してみましょう。
⑩ まとめ
- ポリモーフィズムでは、同じ型として扱いながら実体に応じて動きを変えられる
virtualは、派生クラスで変更できるメソッドを基底クラスに用意するoverrideは、派生クラス用の処理を実装するbaseを使うと、基底クラスの実装も利用できる- 呼び出し側で型ごとの条件分岐を増やさずに、各クラスへ振る舞いを任せられる
これで、WinFormsの見えるクラス階層から、自作クラス、共通型、ポリモーフィズムまでが一本につながりました。