機能追加をしやすいコードを目指そう(1)
プログラムは、それを使う人からはソースコードは見えません。
では、どのように実装しても使う人が満足していればいいのでしょうか?
要望は後から来ることも
最初はこれがいいよって言われていても、やっぱりこんなのが欲しいとか、ちょっとこう変えてほしいなんて要望が来ることは普通です。また、自分でもこの機能を追加したいと思うこともあるでしょう。使われるアプリほどその傾向にあります。アプリの寿命も長くなれば余計ですね
考えておかないと大変
何十年も前から、プログラムを作るひとにとって大きな課題でした。特に世間から必要とされているものはそうですね。
また、そのように優れたプログラムは一人で暗記することもできず、また人は忘れるものなので作った本人でさえ暗号を読み解くようになってしまいます。
積み重ねから生まれた定石
将棋を指す人は、矢倉囲いとか美濃囲いとかの定石があるのをご存知でしょう。また、サッカーではフォーメーションなどうまくいくためのパターンを実践の積み重ねと研究から編み出しています。
プログラムもやはりそのような過程を辿っています。デザインパターンや様々な開発パターンと呼ばれるものです
サンプル
「変更、機能追加の可能性は考えなくても良い」が決まっている場合、また学習用、チェック用のコードの場合は、なるべく単純なのがいいので、今回のお話の対象外とします
次のコードは、「Unityの教科書」の抜粋になります。詳細は本を読んでください。
目的は、アイテムの種類を増やすことが予定されているケースである想定の場合のコードはどのようにすればいいのか考えることです
using System.Collections;
using System.Collections.Generic;
using UnityEngine;

public class BasketController : MonoBehaviour
{
    public AudioClip appleSE;
    public AudioClip bombSE;
    AudioSource aud;
    GameObject director;

    void Start()
    {
        this.director = GameObject.Find("GameDirector");
        this.aud = GetComponent<AudioSource>();
    }

    void OnTriggerEnter(Collider other)
    {
        if(other.gameObject.tag == "Apple")
        {
            this.director.GetComponent<GameDirector>().GetApple();
            this.aud.PlayOneShot(this.appleSE);
        }
        else
        {
            this.director.GetComponent<GameDirector>().GetBomb();
            this.aud.PlayOneShot(this.bombSE);
        }
        Destroy(other.gameObject);
    }

    void Update()
    {
        if (Input.GetMouseButtonDown(0))
        {
            Ray ray = Camera.main.ScreenPointToRay(Input.mousePosition);
            RaycastHit hit;
            if (Physics.Raycast(ray, out hit, Mathf.Infinity))
            {
                float x = Mathf.RoundToInt(hit.point.x);
                float z = Mathf.RoundToInt(hit.point.z);
                transform.position = new Vector3(x, 0, z);
            }
        }
    }
}
やりたいこと
一気にやろうとはしないでください
まず、やりたいことを羅列することが大事です
SE(サウンドエフェクト)は、アイテム側に実装したい
アイテムごとに音源を変えたいのですが、Basketクラスで対応するとどんどんコードが膨れ上がります。それを避けたいためです
アイテムをキャッチした時のポイントは、アイテム側に実装したい
目的は同じです
アイテムをキャッチした時、得点加算以外のこともしたい
遊んでいる人からはあらゆる要望が来ることが考えられますので、柔軟の対応できるように準備しておきます
では順番に考えていきます
SE(サウンドエフェクト)は、アイテム側に実装したい
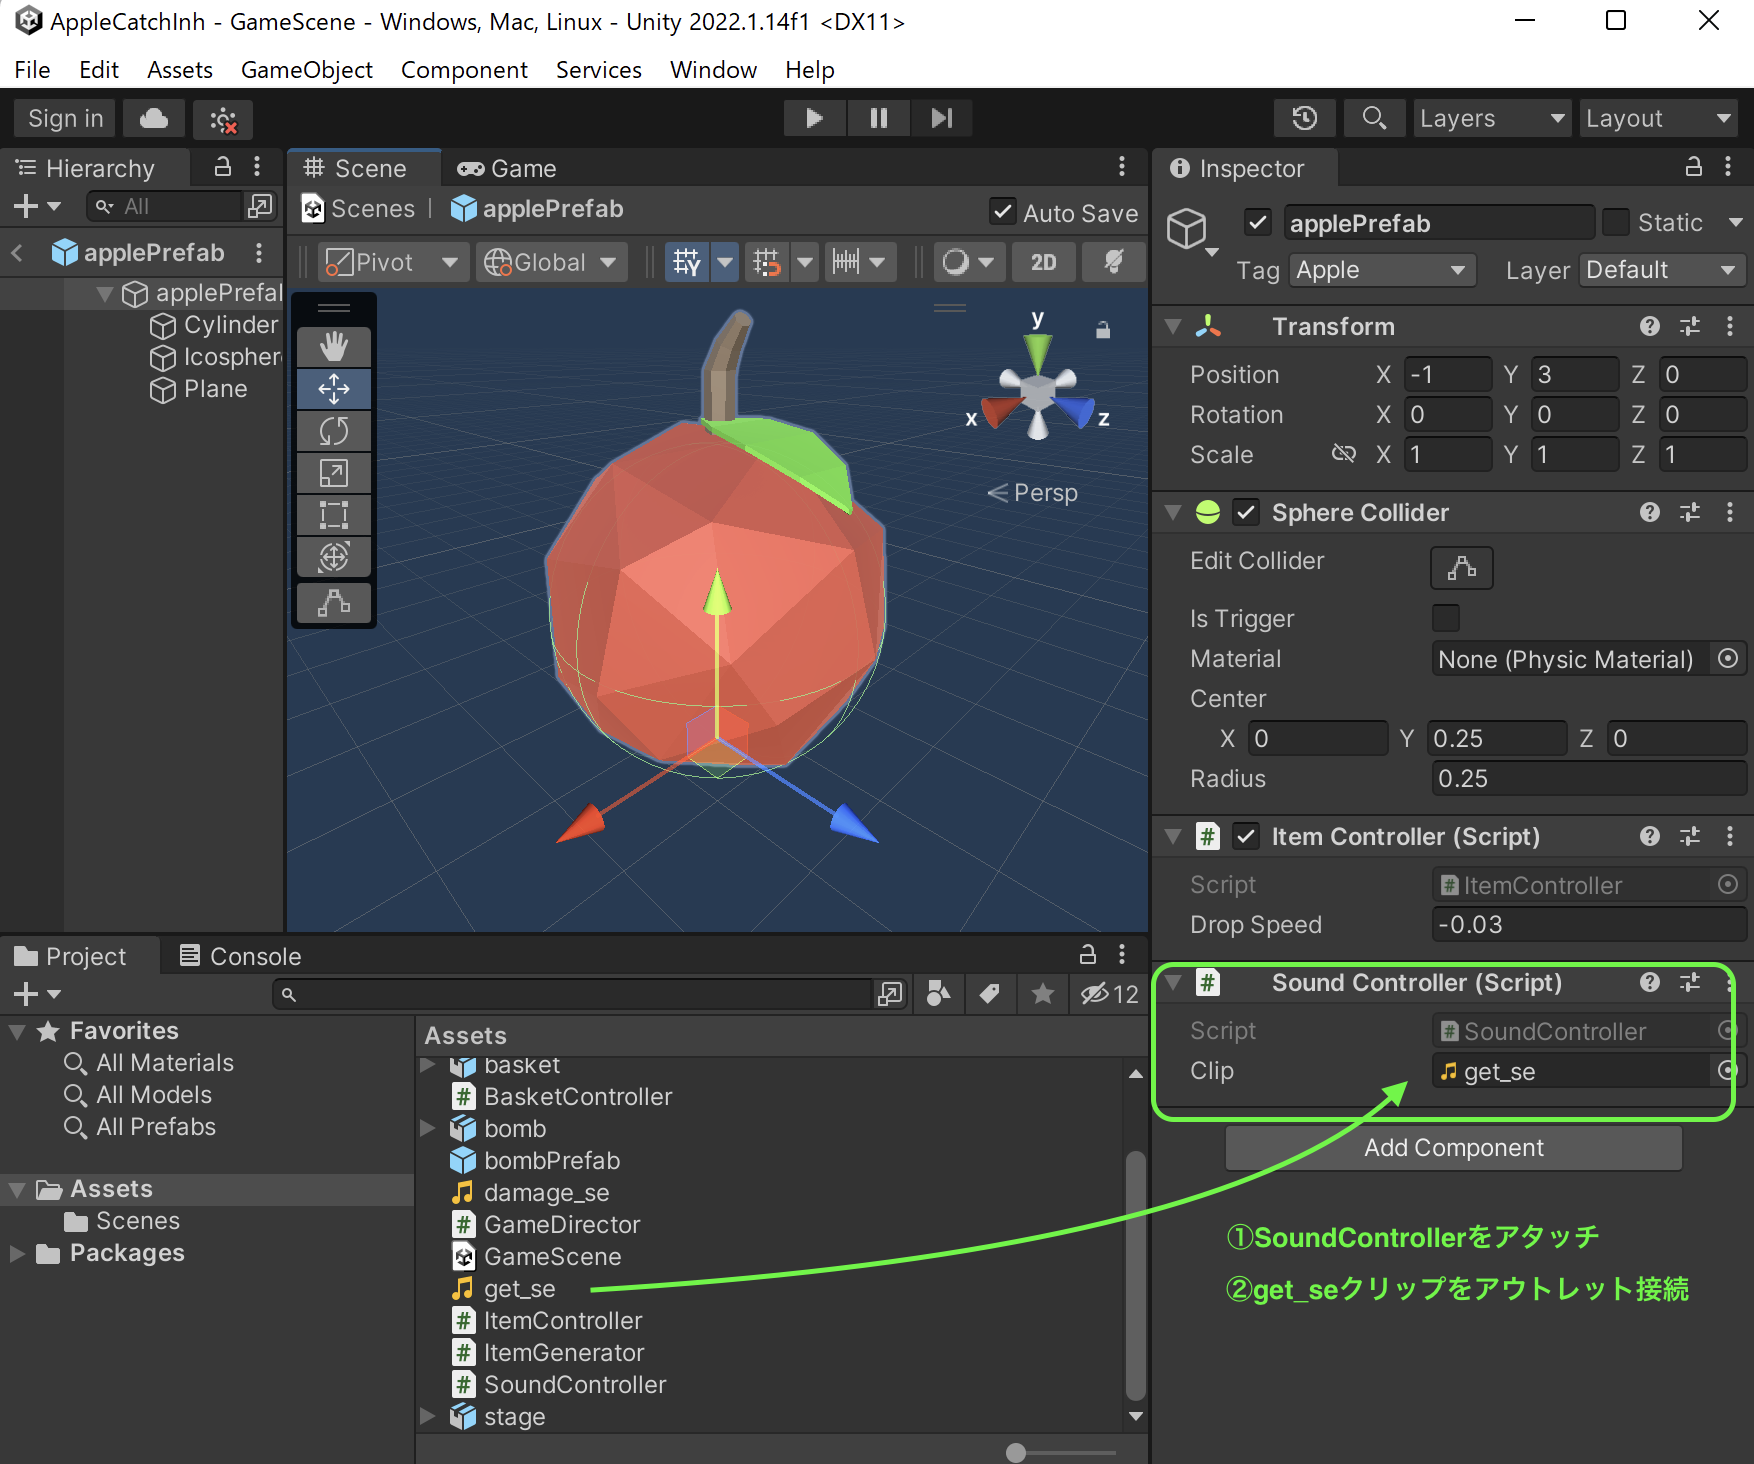
アイテムは、Destroyされますので、そのままPlayで再生すると、Destroyされた時点で再生も止まってしまいます
なので、AudioSource.PlayClipAtPoint(サウンドのクリップ、音源の場所)を使って実現します
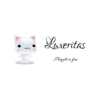
アイテム側で再生するスクリプトを作成
サウンド再生用のスクリプトを作ります
どうアクセスして使うかなどは今考えません
using UnityEngine;

public class SoundController : MonoBehaviour
{
    public AudioClip clip;
    public void PlayCatchSE()
    {
        // サウンド再生のために、UnityがAudioSourceコンポーネントが
        // アタッチされているオブジェクトを作成してPlayするメソッドを呼び出す
        AudioSource.PlayClipAtPoint(clip, transform.position);
    }
}
プレファブにアタッチ
コードをApplePrefabとBombPrefabにアタッチします
BasketControllerの変更
トリガーイベントの部分を次のように変更します
void OnTriggerEnter(Collider other)
{
    // トリガー検出相手からサウンドを再生する
    other.GetComponent<SoundController>().PlayCatchSE();

    /*
    if(other.gameObject.tag == "Apple")
    {
        this.director.GetComponent<GameDirector>().GetApple();
        this.aud.PlayOneShot(this.appleSE);
    }
    else
    {
        this.director.GetComponent<GameDirector>().GetBomb();
        this.aud.PlayOneShot(this.bombSE);
    }
    */
    Destroy(other.gameObject);
}
テストしてみましょう
うまくいきましたか?
AudioSource.PlayClipAtPoint(clip, transform.position);の下の行にDebug.Break();メソッドを追記して、その時のヒエラルキーを確認してみましょう
Gitをコミットしましょう
「SE(サウンドエフェクト)は、アイテム側で実装」をタイトルとしてコミットしましょう
アイテムをキャッチした時のポイントは、アイテム側に実装したい
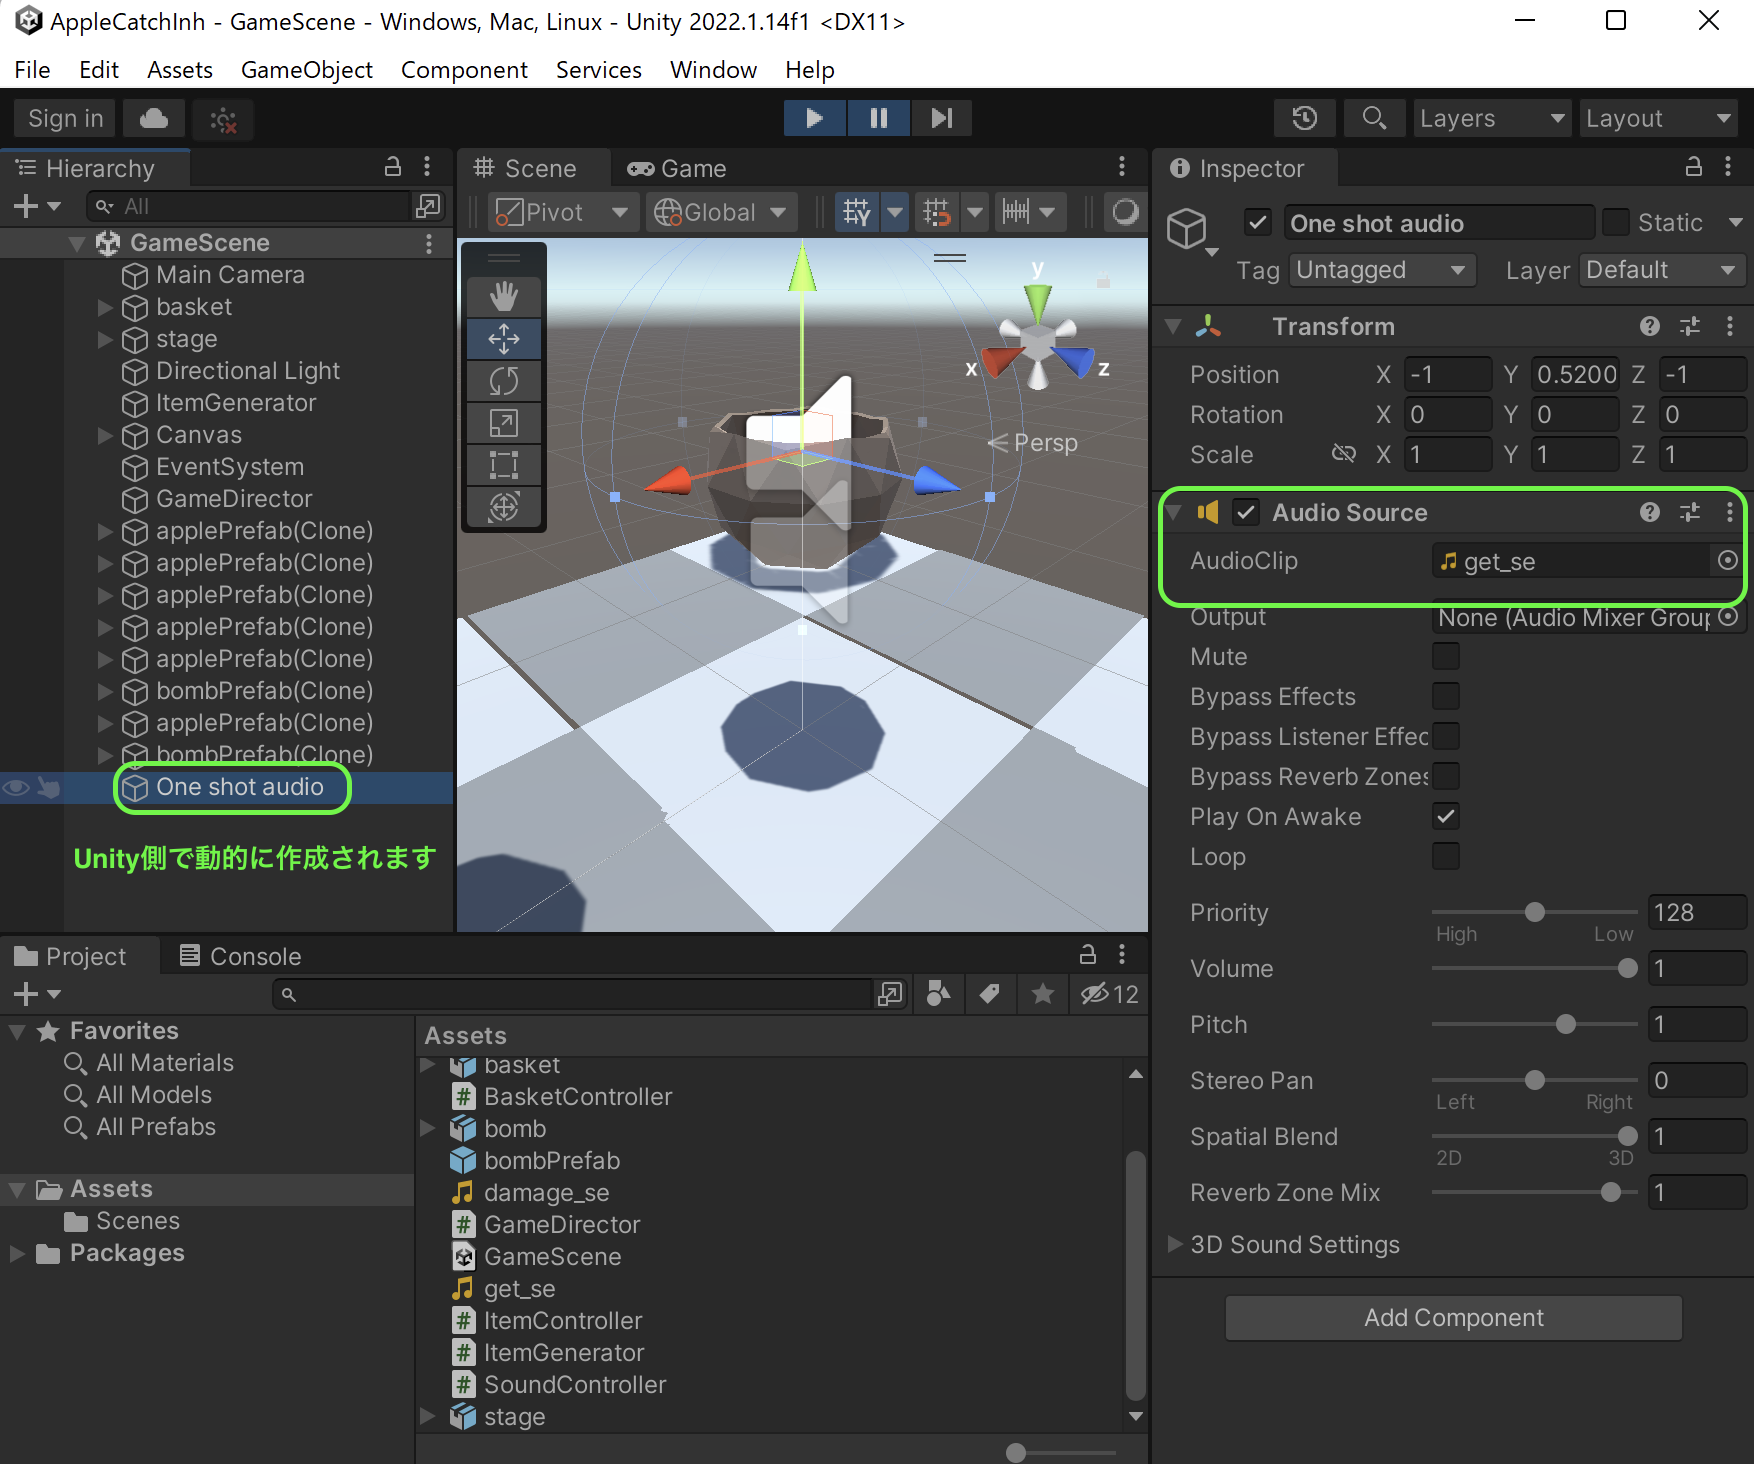
アイテム側でキャッチした時のポイントを登録しておくスクリプトを作成
勉強のため、フィールド(public int HitPoint)ではなく、プロパティとしています
制限をつけるようにしたいときに可能なようにしておきます
インスペクターで設定値を登録するために[field: SerializeField]属性をつけます
using UnityEngine;

public class ItemPoint : MonoBehaviour
{
    [field: SerializeField]
    public int HitPoint { get; set; }
}
プレファブにアタッチ
コードをApplePrefabとBombPrefabにアタッチします
ApplePrefabは、10
BombPrefabは、-10
教科書と仕様を変えています。教科書では、Bombをキャッチすると得点が半分になります
GameDirectorの変更
得点関連の部分を次のように変更します
[field: SerializeField]
public int point { get; set; } = 0;

/*
public void GetApple()
{
    this.point += 100;
}

public void GetBomb()
{
    this.point /= 2;
}
*/
BasketControllerの変更
トリガーイベントの部分を次のように変更します
void OnTriggerEnter(Collider other)
{
    // トリガー検出相手からサウンドを再生する
    other.GetComponent<SoundController>().PlayCatchSE();
    // トリガー検出相手からヒットポイントを取得
    int hitPoint = other.GetComponent<ItemPoint>().HitPoint;
    // 得点を加算する
    director.GetComponent<GameDirector>().point += hitPoint;

    /*
    if(other.gameObject.tag == "Apple")
    {
        this.director.GetComponent<GameDirector>().GetApple();
        this.aud.PlayOneShot(this.appleSE);
    }
    else
    {
        this.director.GetComponent<GameDirector>().GetBomb();
        this.aud.PlayOneShot(this.bombSE);
    }
    */
    Destroy(other.gameObject);
}
テストしてみましょう
うまくいきましたか?
Gitをコミットしましょう
「アイテムをキャッチした時のポイントは、アイテム側に実装したい」をタイトルとしてコミットしましょう
注意)コミット内容について皆さんと次の内容が一致しないこともあります

アイテムをキャッチした時、得点加算以外のこともしたい
使用更新の最後になります
Unityイベントで対応することにします
トリガーイベントの処理をBasketContollerから独立、イベントの処理を行うスクリプトを作成
イベントの処理を新しく作るスクリプトに任せます
UnityEvent(型パラメータにCollider)を宣言します
インスペクターでイベントハンドラを登録できますので、今後、必要に応じてキャッチした時の処理を追加できます
Colliderを引数にしているのは、キャッチした相手の情報をイベントハンドラに渡したいためです
using UnityEngine;
using UnityEngine.Events;

public class CatchEvent : MonoBehaviour
{
   public UnityEvent<Collider> ItemCatch;

    private void OnTriggerEnter(Collider other)
    {
        ItemCatch.Invoke(other);
        other.GetComponent<SoundController>().PlayCatchSE();
        Destroy(other.gameObject);
    }
}
GameDirectorへの追記
GemeDirectorでは得点を管理、またUIへの表示も担っています
次の段階で、これをイベントハンドラとして登録します
public void AddPoint(Collider itemCollider)
{
point += itemCollider.GetComponent<ItemPoint>().HitPoint;
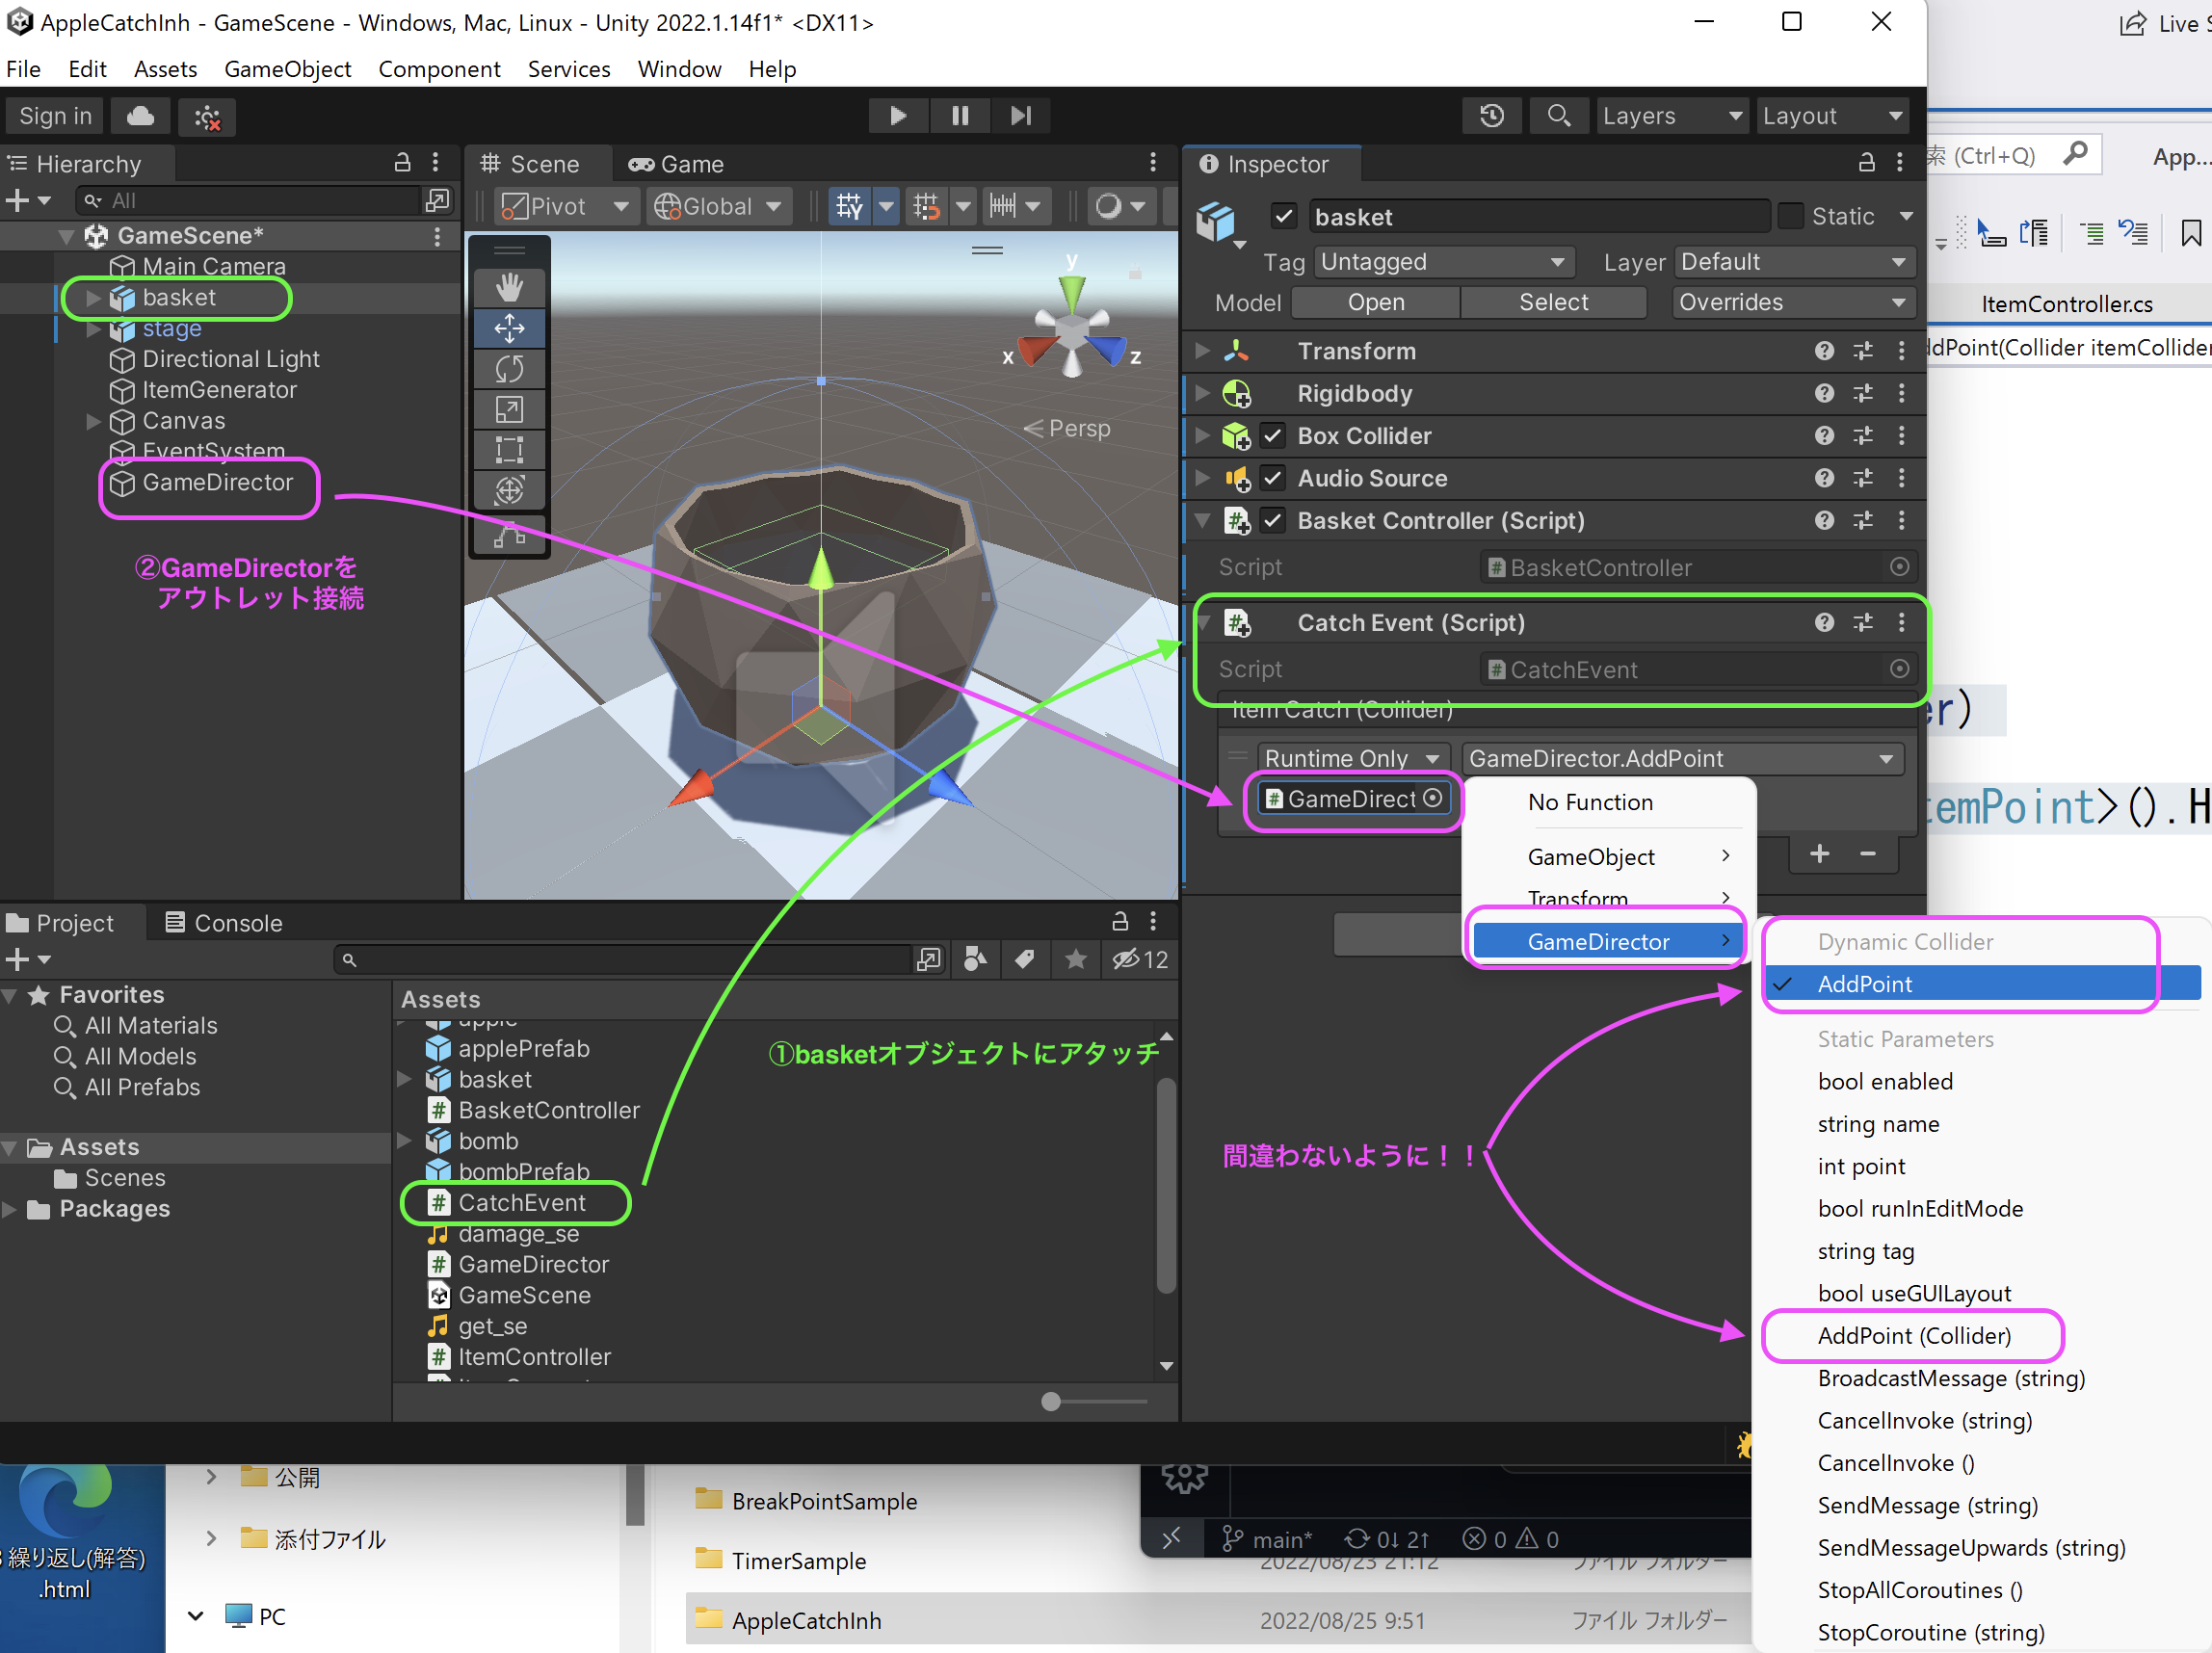
}CatchEventスクリプトをbasketゲームオブジェクトにアタッチ
CatchEventをアタッチして、イベントハンドラを追加します
ポイントを加算したいので、GameDirectorのAddPointを登録します
この時、衝突相手の情報も渡して、GameDirector側でポイントを取得してもらいます
型パラメータのColliderはここで生きてきます
注意)プルダウンメニューで選ぶとき、AddPointは2つ出てきますが、上のDynamic Collider側を選択します
衝突相手はぶつかって見るまでわからないですよね。
テストしてみましょう
うまくいきましたか?
Gitをコミットしましょう
「アイテムをキャッチした時、得点加算以外のこともしたい」をタイトルとしてコミットしましょう
全てのコード
using UnityEngine;
using UnityEngine.Events;

public class CatchEvent : MonoBehaviour
{
    public UnityEvent<Collider> ItemCatch;

    private void OnTriggerEnter(Collider other)
    {
        ItemCatch.Invoke(other);
        other.GetComponent<SoundController>().PlayCatchSE();
        Destroy(other.gameObject);
    }
}
using UnityEngine;
using UnityEngine.UI;

public class GameDirector : MonoBehaviour
{
    GameObject timerText;
    GameObject pointText;
    float time = 30.0f;

    [field: SerializeField]
    public int point { get; set; } = 0;

    GameObject generator;

    public void AddPoint(Collider itemCollider)
    {
        point += itemCollider.GetComponent<ItemPoint>().HitPoint;
    }

    void Start()
    {
        this.generator = GameObject.Find("ItemGenerator");
        this.timerText = GameObject.Find("Time");
        this.pointText = GameObject.Find("Point");
    }

    void Update()
    {
        this.time -= Time.deltaTime;

        if (this.time < 0)
        {
            this.time = 0;
            this.generator.GetComponent<ItemGenerator>().SetParameter(10000.0f, 0, 0);
        }
        else if (0 <= this.time && this.time < 5)
        {
            this.generator.GetComponent<ItemGenerator>().SetParameter(0.7f, -0.04f, 3);
        }
        else if (5 <= this.time && this.time < 12)
        {
            this.generator.GetComponent<ItemGenerator>().SetParameter(0.5f, -0.05f, 6);
        }
        else if (12 <= this.time && this.time < 23)
        {
            this.generator.GetComponent<ItemGenerator>().SetParameter(0.8f, -0.04f, 4);
        }
        else if (23 <= this.time && this.time < 30)
        {
            this.generator.GetComponent<ItemGenerator>().SetParameter(1.0f, -0.03f, 2);
        }

        this.timerText.GetComponent<Text>().text = this.time.ToString("F1");
        this.pointText.GetComponent<Text>().text = this.point.ToString() + " point";
    }
}
using UnityEngine;
public class ItemPoint : MonoBehaviour
{
[field: SerializeField]
public int HitPoint { get; set; }
}using UnityEngine;
public class SoundController : MonoBehaviour
{
public AudioClip clip;
public void PlayCatchSE()
{
// サウンド再生のために、UnityがAudioSourceコンポーネントが
// アタッチされているオブジェクトを作成してPlayするメソッドを呼び出す
AudioSource.PlayClipAtPoint(clip, transform.position);
}
}BasketControllerの次の部分は、現在のC#のバージョンでは、引数内に宣言もできるようになりましたので、
RaycastHit hit;
if (Physics.Raycast(ray, out hit, Mathf.Infinity))
このように更新できます
if (Physics.Raycast(ray, out RaycastHit hit, Mathf.Infinity))using UnityEngine;
public class BasketController : MonoBehaviour
{
void Update()
{
if (Input.GetMouseButtonDown(0))
{
Ray ray = Camera.main.ScreenPointToRay(Input.mousePosition);
if (Physics.Raycast(ray, out RaycastHit hit, Mathf.Infinity))
{
float x = Mathf.RoundToInt(hit.point.x);
float z = Mathf.RoundToInt(hit.point.z);
transform.position = new Vector3(x, 0, z);
}
}
}
}using UnityEngine;
public class ItemController : MonoBehaviour
{
public float dropSpeed = -0.03f;
void Update()
{
transform.Translate(0, this.dropSpeed, 0);
if (transform.position.y < -1.0f)
{
Destroy(gameObject);
}
}
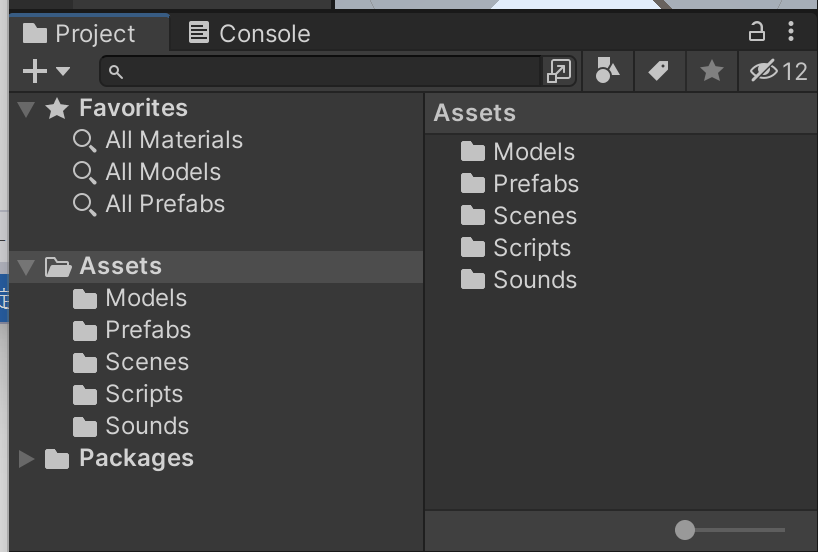
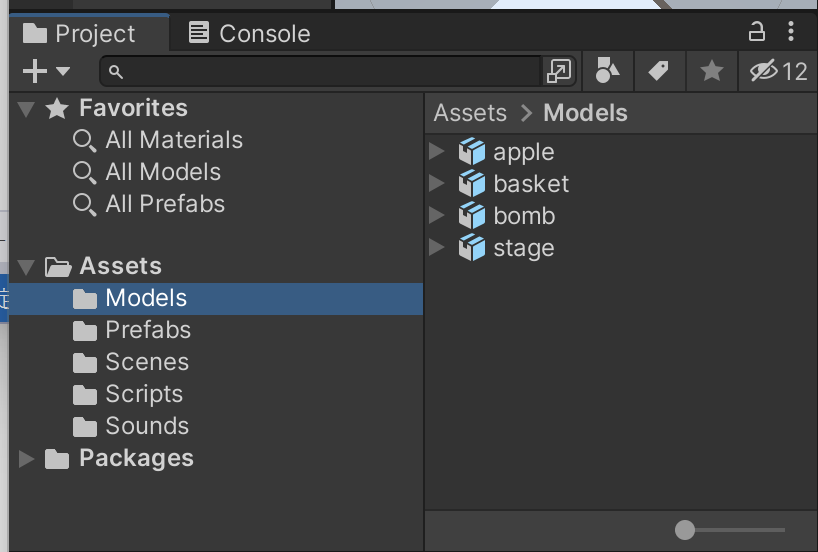
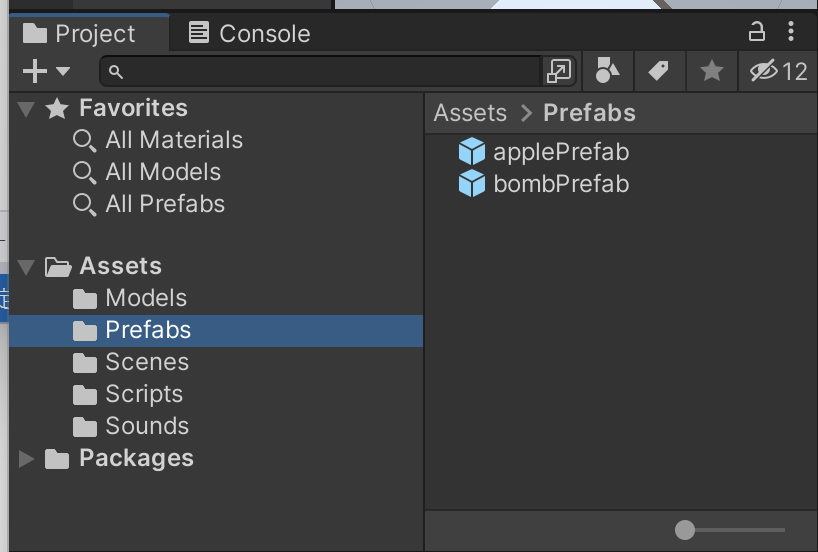
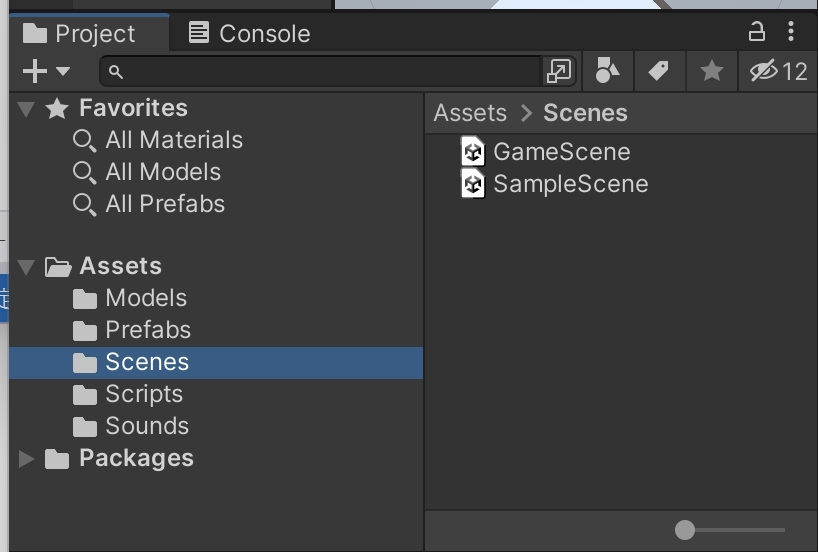
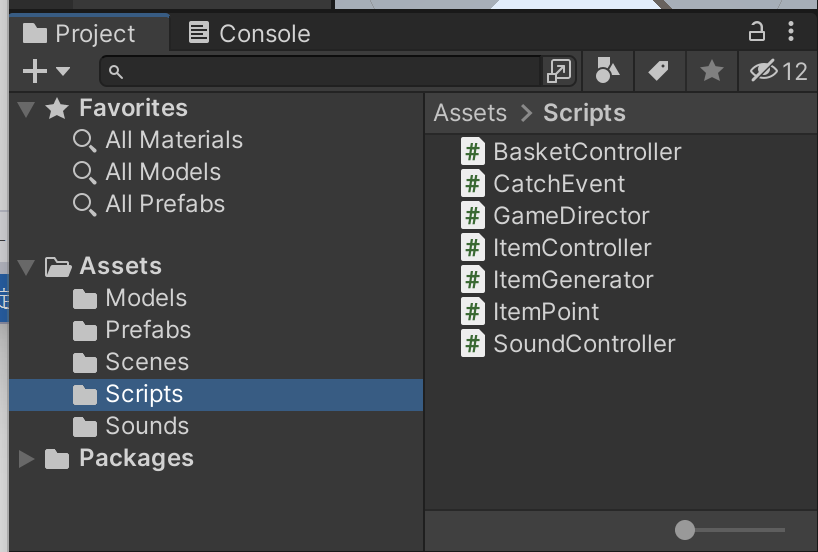
}プロジェクトウィンドウの整理
プロジェクトウィンドウがごちゃごちゃしてきましたよね
一度アセットを整理しておきましょう
フォルダを新規で作成してまとめて整理をしておけます
プロジェクトウィンドウのCreateメニューからFolderを選択、作成されたフォルダに名前をつけていって、ファイルを整理しましょう

Gitをコミットしましょう
「アセットの整理」をタイトルとしてコミットしましょう